5 Best Indoor Grills for Burgers (October 2026)
The best indoor grills for burgers include the Ninja Sizzle GR101 for everyday burger nights, the Ninja Sizzle Pro XL GX101 for feeding a crowd, and the Cuisinart Griddler FIVE for burgers and paninis.
On this page (7 sections)
- What makes the best indoor grill for burgers?
- How should you choose an indoor burger grill?
- How do you set up an indoor grill for burger night?
- How do you cook better burgers on an indoor grill?
- Which mistakes cause smoke, sticking or uneven burgers?
- How should you clean and store an indoor burger grill?
- Which is the best indoor grill for burgers in your kitchen?
The Ninja Sizzle GR101 is the best indoor grill for burgers for most households because it handles regular family batches and includes both grill and griddle plates. Choose the Pro XL for bigger gatherings, or separate cooking zones when sides need their own heat.
Your burger style should guide the choice. Thick patties, thin smash burgers and burgers served alongside grilled vegetables place different demands on the same appliance.
Our grill vs griddle guide explains the surface choices. For other meal styles, compare indoor grill and griddle combos or browse our best indoor grills for home kitchens.
Our picks at a glance
-
1

-
2

-
3

- 4
 Check it
Hamilton Beach 3-in-1 Grill and Griddle
Best for burgers with sides - 5
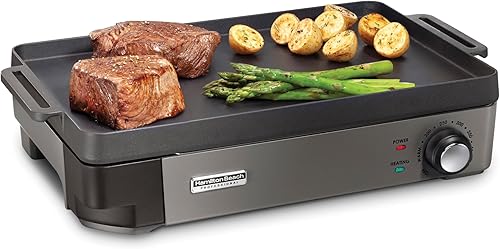 Check it
Hamilton Beach Cast Iron Grill and Griddle
Best for smash burger cooks
What makes the best indoor grill for burgers?
The best fit matches your normal batch, preferred crust and cleanup routine. Extra cooking space helps only when you use it, while plate style affects every burger you cook.
We compared cooking surfaces, temperature controls, cooking modes and care requirements. The order favors useful burger features without assuming the largest or hottest appliance suits every kitchen.
| Product | Best for | Cooking surface | Heat | Cooking style | Our score |
|---|---|---|---|---|---|
| Ninja Sizzle GR101 | everyday burger nights | 14 in grill and griddle plates | Up to 500°F | Interchangeable grill and griddle plates | 8.9 |
| Ninja Sizzle Pro XL GX101 | feeding a crowd | 20 in grill and griddle plates | 250°F to 500°F | Interchangeable grill and griddle plates | 8.7 |
| Cuisinart Griddler FIVE | burgers and paninis | Reversible removable plates | 175°F to 450°F with sear function | Contact grill, full grill, panini press and griddle modes | 7.9 |
| Hamilton Beach 3-in-1 Grill and Griddle | burgers with sides | 180 sq in | Up to 425°F | Full grill, full griddle or half-and-half | 7.8 |
| Hamilton Beach Cast Iron Grill and Griddle | smash burger cooks | 10 x 16 in | Warm to 450°F | Flat cast iron surface | 7.3 |
Best indoor grill for burgers by cooking style
Choose the GR101 for everyday batches, the Pro XL for group meals, or the cast iron model for flat-top burgers. The Cuisinart adds contact cooking, while the Hamilton Beach 3-in-1 gives sides their own heat control.
Read the tradeoffs below before choosing by score alone. A lower-ranked model can be the better buy when its cooking layout matches your meals.
Ninja Sizzle GR101: Best for everyday burger nights
- Interchangeable grill and griddle plates
- Up to 500°F
- Plates fit 6 burgers
- Hood can be used up or down
A good fit for regular family burger nights, with both plate styles and a lid that can close to help melt cheese.
Pros
- Grill and griddle plates included
- High heat up to 500°F
- Capacity for 6 burgers
Cons
- Less batch capacity than the Pro XL
- Separate plates need storage space
The Ninja Sizzle GR101 suits households that want one appliance for regular burgers, weekend breakfasts and occasional flat-top meals. Its 14 in plates fit 6 burgers, according to Ninja, with actual room depending on patty size.
The grill plate gives you ridged contact, while the griddle makes more sense for thin patties and chopped toppings. You change plates between cooking tasks rather than using both surfaces side by side.
The hood can stay up for access or close to retain heat and help melt cheese. Ninja says its perforated mesh lid helps control smoke and splatter, though you still need kitchen ventilation.
The removable nonstick plates simplify wiping and washing, and the detachable lid is dishwasher-safe. At 7.8 lb, this is also a more practical choice for frequent cabinet-to-counter moves than the heavier models here.
Buy it for a regular family burger night with useful breakfast options. Skip it if your normal meal already needs several batches, or if burgers and sides must cook at different temperatures at the same time.
Ninja Sizzle Pro XL GX101: Best for feeding a crowd
- Interchangeable 20 in plates
- Fits 10+ burgers
- Temperature control from 250°F to 500°F
- Ventilated detachable lid
Choose this larger Ninja when serving everyone from one batch matters more than easy storage and lifting.
Pros
- Capacity for larger groups
- ProTemp IQ temperature control
- PFAS-free ceramic nonstick plates
Cons
- Largest footprint among these picks
- Heavy to move at 23.2 lb
The Ninja Sizzle Pro XL GX101 is for cooks whose main frustration is serving burgers in rounds. Ninja gives its 20 in plates a capacity of 10 or more burgers, making it the clearest crowd-cooking choice here.
Its temperature range runs from 250°F to 500°F, with ProTemp IQ controls. The interchangeable grill and griddle plates have a ceramic nonstick surface that Ninja describes as 100% PFAS free.
That larger surface can also accommodate a mix of patty sizes. Keep room for your spatula instead of filling every gap just because another burger fits.
The detachable ventilated lid helps contain splatter, and the removable grease catch gives drippings a separate collection point. Plan where the spare plate and lid will dry after washing.
Choose it when the extra batch capacity gets regular use. Skip it for occasional two-person dinners, especially if you must lift it from a low cabinet each time.
Its 20.85 x 15.22 in footprint and 23.2 lb weight make a permanent counter position worth considering. Our Ninja Sizzle vs Pro XL comparison helps weigh the larger appliance against the smaller model.
Cuisinart Griddler FIVE: Best for burgers and paninis
- Contact grill, panini press and full grill modes
- Adjustable temperature from 175°F to 450°F
- Sear function
- Removable reversible plates
A useful choice when burgers share the weekly menu with pressed sandwiches, breakfast foods and open-griddle meals.
Pros
- Five cooking modes
- LCD shows function, temperature and timer
- Dishwasher-safe removable plates
Cons
- Lower maximum adjustable heat than the Ninja models
- Open cooking needs more room than its closed footprint
The Cuisinart Griddler FIVE fits a kitchen where burgers share appliance time with paninis, eggs and other griddle meals. Its 5 cooking modes include contact grill, panini press, full grill, full griddle and half grill with half griddle.
Contact cooking brings a heated plate against each side of the food. That offers a different workflow from an open grill, but you shouldn't press down on the handle to squeeze a burger flat.
The floating cover helps accommodate food thickness. For delicate patties or a burger topped with cheese, open cooking gives you easier access and avoids bringing the upper plate against the topping.
The LCD shows the function, temperature and timer, while the reversible cooking plates are removable and dishwasher-safe. Cuisinart backs the appliance with a limited 3-year warranty.
Buy it if pressed sandwiches are also a regular meal and dishwasher-safe plates matter. Skip it if you mainly want a broad open surface for a large burger batch.
Measure the space needed in the cooking position you plan to use. Its closed dimensions don't describe the full room required when opened for full-surface cooking.
Hamilton Beach 3-in-1 Grill and Griddle: Best for burgers with sides
- Two cooking zones with separate controls
- Reversible grill and griddle plates
- 180 sq in cooking surface
- Adjustable heat up to 425°F
Independent heat controls suit meals with burgers on one side and onions, mushrooms or buns on the other.
Pros
- Two independent cooking zones
- Can use one zone for smaller meals
- Dishwasher-safe plates and top-rack-safe drip tray
Cons
- Lowest maximum temperature among these picks
- Requires 20.1 in of counter width
The Hamilton Beach 3-in-1 Grill and Griddle suits cooks who build the whole burger meal on one appliance. Its 2 independently controlled zones let you give patties and toppings different heat settings.
Set up a ridged side for burgers and a smooth side for onions or mushrooms. You can also use both reversible plates in the same orientation when the meal calls for all grilling or all griddling.
The 180 sq in surface offers room to divide tasks, but assigning one side to vegetables reduces the area available for patties. Plan the meal around that split rather than treating the entire appliance as burger space.
You can use just one zone for a smaller meal. Afterward, the plates are dishwasher-safe, and the drip tray can go on the top rack.
Choose it for burgers with cooked toppings or sides, especially when those foods need gentler heat. Skip it if high-temperature searing is your main priority, since its maximum setting is 425°F.
It needs 20.1 in of counter width. Check that you can also place a tray nearby without blocking access to either cooking zone.
Hamilton Beach Cast Iron Grill and Griddle: Best for smash burger cooks
- 10 x 16 in preseasoned cast iron surface
- Adjustable heat up to 450°F
- Flat cooktop permits full patty contact
- Removable cooktop
The flat cast iron cooktop suits cooks who want broad burger browning and are comfortable maintaining seasoned iron.
Pros
- Preseasoned cast iron surface
- Metal utensils can be used
- Removable cooktop and drip tray
Cons
- No ridged cooking plate
- Heavy to move at 22.2 lb
- Seasoned iron needs drying and care
The Hamilton Beach Cast Iron Grill and Griddle suits cooks who prefer full contact between the patty and a flat iron surface. That layout works well for thin burgers with a broad browned crust.
Its preseasoned 10 x 16 in cooktop provides an uninterrupted surface for a spatula. Hamilton Beach says the cast iron holds heat better than aluminum, a useful trait when adding cold food.
Unlike the coated plates on several alternatives, this cast iron surface permits metal utensils. That matters if your burger routine involves sliding a thin metal spatula beneath the crust before turning.
Grease drains into a removable tray, and the cooktop lifts off the base for cleaning. The tray is top-rack dishwasher-safe, but the iron needs its own care routine.
Choose it for flat-top burger cooking and seasoned-iron care. Skip it if you want grill marks, contact cooking or plates you can put straight into the dishwasher.
At 22.2 lb, it also suits a stable counter position better than frequent lifting. Make sure both the cooking area and the washing area can accommodate the removable surface.
How should you choose an indoor burger grill?
Start with patty style, batch size and available workspace, then compare controls and cleanup. Those choices affect daily use more than an extra cooking mode you rarely need.
Choose the surface for the crust you want
A ridged plate makes narrow bands of contact and leaves grill marks. A flat griddle touches more of the patty, giving you room to build a broader crust.
For thick, formed burgers, either surface can work. For smash-style burgers, choose a flat surface that supports the whole patty and lets a spatula slide beneath it.
Smashing also requires pressure, so follow the appliance's utensil and use instructions. Don't assume a coated removable plate can take the same tools or force as a cast iron cooktop.
Match capacity to the meal you actually serve
Count patties rather than people. Four diners eating double burgers need more cooking room than six diners having one small burger each.
Then account for how you serve the meal. Toasting buns, cooking onions or leaving room for wide patties can turn a nominally large batch into two smaller rounds.
Cut paper circles to your usual patty size and compare them with the stated cooking surface. Allow gaps for turning, and remember that the appliance's outer dimensions aren't the usable plate dimensions.
Our indoor grill size guide helps match cooking capacity with counter and storage space.
Separate maximum heat from heat management
A high maximum setting gives you more room for searing, but preheating and spacing still matter. Cold patties draw heat from the surface, and crowding makes it harder for moisture to escape.
The Ninja models reach 500°F; the Cuisinart and cast iron Hamilton Beach reach 450°F. These settings don't establish how quickly a loaded plate regains heat or how every patty will brown.
Choose independent zones if your sides need different heat from the burgers. Choose a single broad surface if most of your cooking uses one temperature and you value flexible spacing.
Plan the cooking footprint, not just storage
Measure counter depth, width and the room needed to open a lid safely. Keep space beside the appliance for a spatula, raw-food tray and clean serving plate.
A grill that fits in a cabinet may still be awkward to lift out. Heavier models make more sense when they can stay near the place you'll cook.
Also consider the sink and drying area. A large removable plate must fit somewhere after dinner, even when the base itself wipes clean.
How do you set up an indoor grill for burger night?
Set the appliance on a stable, heat-safe surface with the clearances its manual requires. Assemble the plate and grease catch before preheating, and keep the cord away from hot surfaces and wet areas.
Arrange ventilation before the plate gets hot
Use suitable kitchen ventilation from the start. A ventilated lid can limit splatter, but it doesn't carry cooking fumes out of the room.
Keep the appliance away from curtains and items that could contact the lid or hot plate. Follow the manufacturer's placement directions rather than squeezing it into a tight gap beneath cabinets.
Our indoor grill ventilation basics explains airflow and placement. Apartment cooks should also read our indoor grills for apartments guide before choosing a permanent cooking spot.
Give raw and cooked food separate places
Prepare a raw-patty tray and a clean serving plate before heating the grill. Keep a clean utensil available for finished burgers, and wash anything that touches raw meat before reusing it.
Set out cheese, buns and toppings in advance. That lets you finish burgers without leaving the cooking area to search for ingredients.
Keep patties chilled until you're ready to cook them. Arrange the rest of the meal so raw meat doesn't need to sit beside a hot appliance while sides are prepared.
Preheat with the right plate installed
Follow the appliance's preheating instructions with the chosen plate properly seated. A surface that feels warm isn't necessarily ready to brown a burger.
Start with a clean grease catch and confirm that drainage paths are clear. Don't line or cover parts unless the manual specifically allows it, since that can interfere with heat or grease flow.
For the full sequence from placement to serving, see our guide to grilling indoors.
How do you cook better burgers on an indoor grill?
Use a preheated surface, spaced patties and a food thermometer. Good browning comes from steady contact, while doneness needs a check inside the burger.
Form patties evenly and handle them gently
Make patties similar in thickness so they cook at a similar pace. Avoid working ground meat more than needed to hold its shape.
Thin burgers suit quick flat-top cooking, while thick patties need more time for heat to reach the center. Don't apply the same timing to both, even when the outside looks similar.
Season close to cooking, and remove excess surface moisture before the patty touches the plate. Use only the oil your recipe and appliance instructions call for.
Leave room and turn with care
Space burgers so you can slide a spatula beneath each one without pushing into its neighbor. If patties touch or overlap, split the meal into another batch.
Give the first side time to brown before trying to move it. Use a utensil suited to the plate, and support the patty as you turn it.
For formed burgers, avoid repeatedly pressing out the juices. Smash-style cooking is a separate method in which the initial flattening happens early on a suitable flat surface.
Check the center rather than following the clock
Use cooking times as a planning guide, since thickness, starting temperature and batch size change the result. Check burgers with a food thermometer and follow safe internal-temperature guidance for the meat you're using.
Insert the probe so its sensing area reaches the center of the patty. For a thin burger, approaching from the side can make that easier.
Check more than one burger when thickness varies. A browned crust, grill marks or melted cheese doesn't establish that the center is ready.
Finish cheese and buns without crowding
Add cheese near the end so it can soften without spending the whole cooking time on the grill. On suitable lidded models, closing the lid can help retain heat around the topping.
Keep cheese clear of a heated contact plate unless the appliance instructions allow that use. Open cooking is easier when you want to watch the topping melt.
Toast buns separately if the burger batch fills the surface. Clear crumbs and loose cheese before the next batch so they don't burn beneath fresh patties.
Which mistakes cause smoke, sticking or uneven burgers?
The most avoidable problems are too much food, leftover grease and moving patties too soon. Fix those habits before assuming you need a larger or hotter grill.
Filling every inch of the plate
Maximum capacity describes fit, but comfortable cooking also requires access. Oversized patties and a crowded layout leave little room to turn burgers or move them away from hot grease.
Start with a manageable batch. Add fewer burgers next time if turning them requires lifting or pushing neighboring patties.
Using maximum heat for every stage
High heat can brown the outside before a thick burger finishes inside. Follow the recommended starting setting and adjust as needed instead of leaving the dial at maximum by habit.
If grease starts smoking heavily, reduce heat and follow the appliance's instructions. Don't add water to hot grease or improvise a cover over the appliance.
Treating all lids as presses
A ventilated cover contains splatter and retains some heat; a contact grill has a heated upper cooking plate. Those are different functions.
Use each lid as designed. Pushing down on a burger can force out juices and send more grease onto the cooking surface.
Leaving cleanup until the next meal
Old residue can smoke or transfer burnt flavors when the grill heats again. A full grease catch also leaves less room for the next batch's drippings.
Clean after each cooking session once the appliance is safe to handle. That gives you a clean starting point and makes preheating less likely to produce smoke from old food.
How should you clean and store an indoor burger grill?
Unplug the appliance, let it cool as directed, and clean the plate, grease path and catch after each use. Keep the electrical base out of water and follow the care instructions for each removable part.
Separate dishwasher-safe parts from the rest
The Cuisinart and Hamilton Beach 3-in-1 have dishwasher-safe cooking plates. Don't extend that permission to every lid, tray or base.
For the GR101, dishwasher-safe care applies to the detachable mesh lid. Follow the plate instructions separately, and let all parts dry before reassembly.
Our guide to whether indoor grill plates are dishwasher-safe explains why removable doesn't automatically mean dishwasher-safe.
Protect coated plates and seasoned iron
Use nonabrasive tools on nonstick surfaces, and avoid stacking sharp items against them. For stubborn residue, follow the manual's softening and cleaning method instead of scraping aggressively.
Cast iron needs thorough drying after cleaning. Follow the cooktop's seasoning guidance, and don't leave the surface soaking or stored damp.
Before putting any model away, empty the grease tray and check the underside of removable parts. Store plates securely so they can't slide out when you lift the appliance.
Which is the best indoor grill for burgers in your kitchen?
Choose the GR101 when normal family batches and easy moving matter most. Move to the Pro XL when larger meals are routine and you have room to keep a heavier appliance nearby.
Pick the Cuisinart for burgers plus pressed sandwiches, or the Hamilton Beach 3-in-1 when toppings and sides need separate heat. Choose the cast iron Hamilton Beach when flat-top burgers and metal-utensil use fit your cooking habits.
Before ordering the best indoor grill for burgers for your household, settle three things: your normal patty count, where the appliance will operate and where its plates will dry. Those answers make the choice clearer than maximum heat alone.
If the larger Ninja fits that plan, read our Ninja Sizzle Pro XL review for a closer look at its cooking layout and care.
Our top 3 picks at a glance
-
1
-
2
-
3
Frequently asked questions
What temperature is best for grilling burgers indoors?
Start with the burger setting or temperature guidance in your appliance's manual. A higher setting helps brown the outside, but thick patties may need gentler heat after searing.
Use a food thermometer to check the center, since the control setting and crust color don't establish safe doneness.
Should I choose a ridged grill plate or a flat griddle for burgers?
Choose a ridged plate for grill marks or a flat griddle for broad browning and smash-style burgers. A flat surface also keeps small pieces of onion from falling between ridges.
Our grill vs griddle guide explains how the cooking surfaces change food contact and the way you use a spatula.
How many burgers can an indoor grill cook at once?
Ninja gives a capacity of 6 burgers for the GR101 and 10 or more for the Pro XL GX101. Larger patties, wide spatulas and space for toppings can reduce the practical batch size.
Plan around your usual burger diameter, and leave enough room to turn each patty without disturbing its neighbors.
How can I reduce smoke when grilling burgers indoors?
Start with a clean plate and grease catch, use the temperature your recipe needs, and run suitable kitchen ventilation. Old grease and excess oil can smoke before your burgers finish.
A lid that limits splatter doesn't remove the need for airflow; our indoor grill ventilation guide covers placement and setup.


